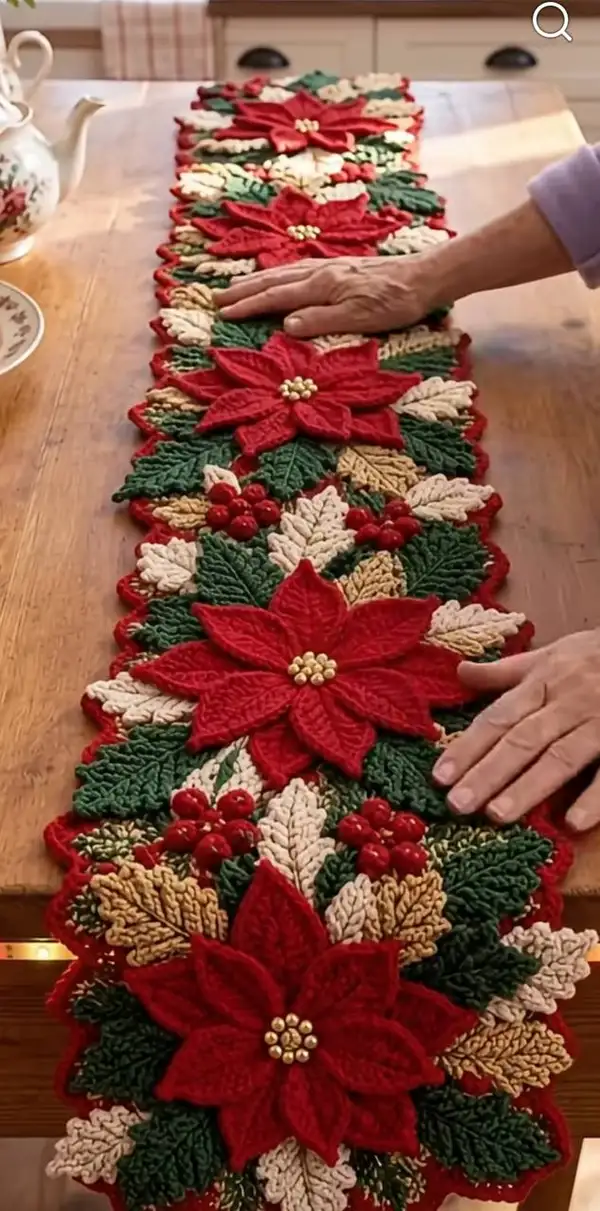
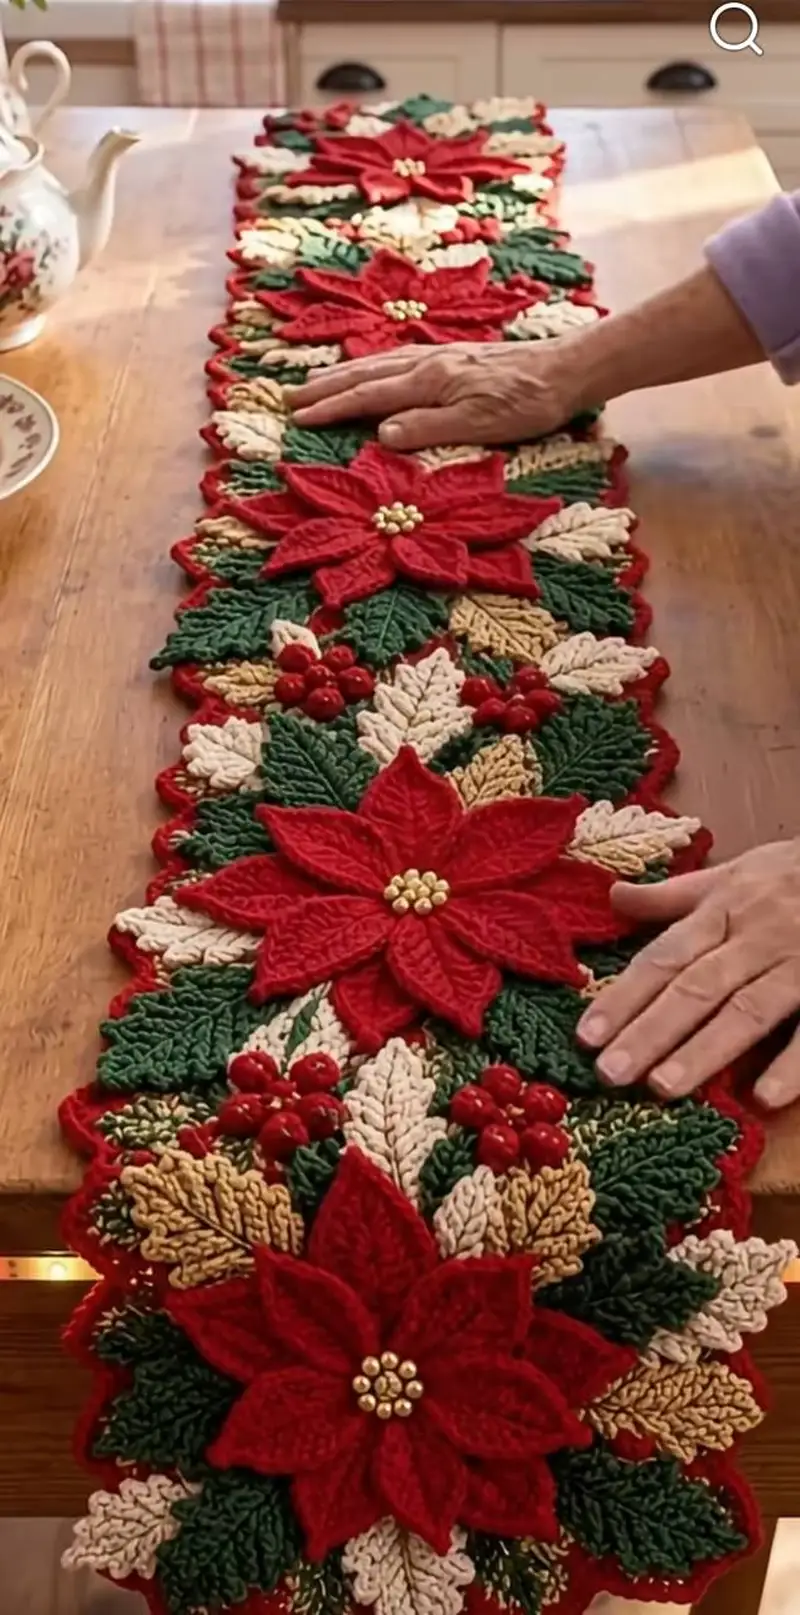
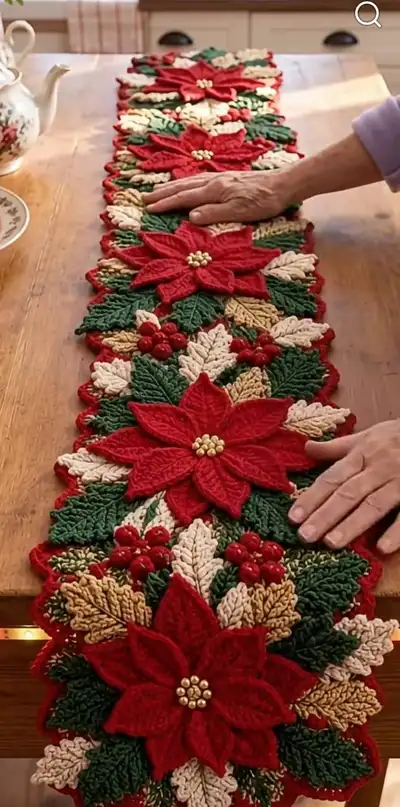
Bring classic holiday charm to your table with this richly textured poinsettia table runner. The runner features layered red poinsettia flowers, deep green and golden leaves, cream filler leaves, and glossy berry clusters, all joined with a scalloped red border for a polished finish. The modular motifs are made separately and joined-as-you-go for a dimensional, heirloom-quality centerpiece. Ideal for gifting or seasonal decor, this pattern emphasizes texture, layering, and color contrast.
Progress Tracker
0% Complete
— Overview :
Info :
This pattern is modular: you will make multiple poinsettia flower motifs, a variety of leaf motifs in three colors, small berry clusters, and then join them in a staggered layout to form the runner. Work petals and leaves flat and block lightly before assembly for crisp shaping. Use a slightly smaller hook for petals for definition (3.5mm) and 4.0mm for leaves and joining if you prefer a slightly looser background to ease joining.
— Flower Center (Make 1 center per flower) :
Round 1 :
6 sc in magic ring (6)
Round 3 :
(1 sc, 1 inc) x 6 (18)
Round 4 :
Working in BLO: 1 sc in each st (18)
Info :
The center circle is a small flat disc that forms the base for bead attachment. Fasten off leaving a long tail for sewing. Sew 6–8 small gold seed beads in a tight circle to mimic the poinsettia center or use a small cluster of golden buttons. If using beads with shanks, use glue plus stitching to secure.
— Large Poinsettia Petal Module (Make 8 per full flower) :
Info :
These petals are worked flat in rows from a small foundation. Use 3.5mm hook and red worsted yarn for crisp shaping. Each petal will be shaped with increases then tapered to a point. Block petals slightly to flatten and emphasize the central ridged texture using FPDC/BPDC ribs.
Round 1 :
Ch 9, sc in 2nd ch from hook and in next 2 ch (3), hdc in next ch (1) (4)
Round 2 :
Turn. Inc in first st, sc next 2, hdc next (inc, maintains shaping) (5)
Round 3 :
Turn. Ch1, sc in each st across (5)
Round 4 :
Turn. Ch2 (counts as hdc), hdc in next 2 sts, 2 hdc in final st (creating small fan) (6)
Round 5 :
Turn. Ch1, sc in first 2 sts, hdc in next 3 sts, sc in final st (6)
Round 6 :
Turn. Ch2, fpdc around next 2 sts (creating a raised center ridge), hdc in next, 2 hdc in final st (7)
Round 7 :
Turn. Ch1, sc across first 3 sts, hdc in next 3 sts, sc final st (7)
Round 8 :
Turn. Ch3 (counts as dc), dc across next 2 sts, tr in final st (5 tall stitches for taper) (5)
Round 9 :
Turn. Ch1, sc in first st, hdc next, sc next 3 (5)
Round 10 :
Turn. Ch1, dec over first 2 sts, sc next 3 (4)
Round 11 :
Turn. Ch1, sc in first 2 sts, dec over final 2 sts (3)
Round 12 :
Turn. Ch1, sc in each st (3)
Round 13 :
Turn. Sl st across center spine to create closure at tip and shape point; fasten off leaving long tail for sewing (3)
Info :
To create visible midrib texture, after making the petal you can work 1–2 rows of FPDC down the center from base to tip by inserting hook vertically along the petal center. Block each petal on a pin mat to flatten and maintain curve. Make 8 identical large petals for each flower.
— Small Poinsettia Petal Module (Make 8 per full flower, inner layer) :
Round 1 :
Ch 7, sc in 2nd ch from hook and next 2 ch (3)
Round 2 :
Turn. Ch1, inc, sc next 2 (4)
Round 3 :
Turn. Ch2, hdc in each st across (4)
Round 4 :
Turn. Ch1, sc in first, hdc in next 2, sc in final (4)
Round 5 :
Turn. Ch2, fpdc in the center two stitches to create a raised ridge (4)
Round 6 :
Turn. Ch1, sc across (4)
Round 7 :
Turn. Ch1, dec over first 2 sts, sc next 2 (3)
Round 8 :
Turn. Ch1, sc all sts (3)
Round 9 :
Turn. Sl st across to gather tip lightly, fasten off leaving long tail for sewing (3)
Info :
Small petals are slightly narrower and will sit between the large petals; arrange them offset between large petals to create a full layered bloom. Make 8 per flower. Block lightly for consistent curvature.
— Assembling a Single Poinsettia Flower :
Round 1 :
Place Flower Center disc on work surface with right side up; using long tail from center, stitch first large petal at base of center with whip stitch through center tail. Repeat to sew 8 large petals evenly spaced around center (work approx every 2–3 stitches around the center disc to maintain symmetry). (Center + 8 petals)
Round 2 :
Once 8 large petals are attached, using another long tail from inner small petals, tuck and sew 8 small petals between large petals so tips overlap slightly and inner petals sit closer to the center. Adjust spacing visually to mimic photo. (8 small petals)
Info :
Pin each petal in place before sewing. Use the bead cluster to anchor the center: sew through bead holes into center disc and knot securely at the underside. If using glued beads, tack with a few stitches to ensure stability. Make 3–4 complete poinsettia flowers per runner section as pictured (repeat motif count according to desired runner length).
— Large Leaf Module (Deep Green) (Make many) :
Info :
Leaves are worked flat from base to tip with central ribs created by FPDC/BPDC. Use 4.0mm hook and forest green yarn. Each large leaf will measure approximately 10–12 cm when blocked, matching the scale seen alongside the flower.
Round 1 :
Ch 14, sc in 2nd ch from hook and next 4 ch (5)
Round 2 :
Turn. Ch2, hdc in next 3 sts, 2 hdc in final ch (6)
Round 3 :
Work down opposite side of foundation chain: hdc in next 3, hdc in final base st (total across both sides now) (10)
Round 4 :
Ch1, sc around entire outline to tidy edge (10)
Round 5 :
Ch2, fpdc around central 4 stitches from base toward tip to form raised central rib. On reaching tip, ch3 and turn to work back down the other side repeating fpdc to form symmetric rib (working in rows) (count varies by shaping) (approx 12)
Round 6 :
Turn. Sl st to continue edge, sc in each st along edge to smooth (12)
Round 7 :
Ch2, *dc in next st, sk next st, dc in next*, rep along both edges to form veining texture (12)
Round 8 :
Ch1, sc around entire leaf edge, fasten off leaving long tail for sewing (12)
Info :
After finishing, pin-block each leaf into a slight curve to mimic natural leaves. Make at least 3–4 large leaves for each flower cluster in the layout seen. For each poinsettia cluster along the runner, plan for 6–8 large leaves to frame the bloom depending on density desired.
— Small Leaf Module (Cream and Gold) (Make many) :
Round 1 :
Ch 10, sc in 2nd ch from hook and next 3 ch (4)
Round 2 :
Turn. Ch2, hdc next 2, 2 hdc in final ch (5)
Round 3 :
Work back down foundation side hdc next 2, sl st into base (7)
Round 4 :
Ch1, sc around to finish edge (7)
Round 5 :
Ch2, fpdc down center two stitches to create a ridge; fasten off leaving long tail (7)
Info :
Smaller leaves are used as fillers between petals and larger leaves. Switch color to cream for bright contrast and to warm gold for accent leaves placed toward the outer edges of the clusters. Make at least 6–10 small leaves per flower cluster arrangement.
— Berry Cluster (Make clusters of 3–6 per runner section) :
Round 1 :
Using bright red yarn, magic ring, 6 sc in MR (6)
Round 2 :
Inc in each st around (12)
Round 3 :
1 sc in each st (12)
Round 4 :
(1 sc, dec) x 4 (8)
Round 6 :
Fasten off leaving tail. Stuff lightly with polyester fill; shape into firm little berry. Close opening using tail and needle (4)
Info :
Sew 3–5 of these berries together into a small cluster using yarn tails and a few cross stitches. Attach clusters near petal bases and where leaves intersect. Alternatively use small glossy red beads; glue or stitch into place for extra shine.
— Filler Seed Bead Clusters (Golden) :
Round 1 :
Thread 6 small gold seed beads onto a short length of thread. Use yarn needle to stitch thread through the center disc of flower from underside. Bring all beads to rest at center and secure with several stitches; knot and bury the tail inside the center disc. (bead cluster)
Info :
Seed bead centers give the poinsettia its classic sparkle. Use matching gold beads; stitch through multiple times for durability. If beads are difficult to sew into yarn, tack them with a drop of craft glue after stitching.
— Making a Full Poinsettia Unit (All parts combined) :
Round 1 :
Assemble a single flower by placing the center disc, sewing on eight large petals evenly, then sewing eight small petals between the large ones. Add bead cluster in the center and secure. (1 complete poinsettia)
Round 2 :
Arrange and sew 6–8 large leaves around the flower, spacing to create a radial layout. Add several cream and gold small leaves in groups between large leaves to match the placed composition in the photo. (leaves attached)
Round 3 :
Sew 1–2 berry clusters near the base of the flower and in leaf groups to create visual anchors along the runner. Each cluster should be sewn through leaf bases and into the underside of the flower center to ensure stability. (berries attached)
Info :
Create three to four identical poinsettia units spaced evenly along the runner length. Alternate placement so flowers are not directly centered along the runner but slightly staggered to create a flowing composed look as shown in the image.
— Joining Motifs into Runner Rows (Join-As-You-Go Approach) :
Round 1 :
Plan layout: Place first full poinsettia unit at desired start point. Using red yarn and 4.0mm hook, join adjacent leaf edges to leaf edges of next motif with slip stitch joins, working from underside so joins are less visible. For each join: align motifs edge to edge, insert hook through both edge stitches and sl st through both stitches to join. (each join seals 1 stitch pair)
Round 2 :
Where motifs overlap at petal tips and leaf points, use whip stitch with matching yarn for a nearly invisible seam. Sew through the back loops only of both motifs to create a neat flat join. (seam completed)
Round 3 :
When two motifs meet in the center of the runner, use a combination of slip stitch joins and short sewings to secure them such that the runner remains flat and decorative. Keep joins flexible; do not pull too tight or motifs will cup. (flat join)
Round 4 :
For longer runner length, add a third motif slightly overlapping the second; use the same join-as-you-go method to attach leaf-to-leaf and petal base-to-filler leaf connections. Repeat until desired runner length is achieved. (row assembled)
Info :
Test layout on a flat surface and move motifs until you find a pleasing arrangement; pin motifs prior to joining. Remember that the photo shows a repeating rhythm: flower, gap with leaves/berries, flower. Space flowers approximately 18–22 cm apart depending on your motif size. Adjust spacing to taste.
— Edge Filling and Small Filler Motifs :
Round 1 :
Between the major poinsettia units fill gaps with extra small leaves and a pair of berries. Use whip stitch to tack small leaves in place on top of larger leaf edges to create layered interest. (filler attached)
Round 2 :
Sew bead clusters and 2–3 small knitted/crocheted berries in most gaps to maintain visual density and the textured look in the photo. (beads & berries attached)
Info :
Keep filler elements slightly raised by sewing only at the base so leaf tips and berries remain dimensional. This creates that lush layered appearance seen in the original image.
— Scalloped Border and Final Edge (Worked Around Entire Runner) :
Info :
Once all motifs are joined into the runner body, work a continuous scalloped border around the entire perimeter using red yarn. This border ties the motifs together and creates the shaped wavy edge seen in the image.
Round 1 :
With red yarn and 4.0mm hook, attach at one corner with sl st. Round around edge: sc evenly along exposed edges of motifs, placing 1 sc approximately every 4–6 mm depending on spacing (work density to match motif scale) (edge sc)
Round 2 :
Begin scallops: *sk 1–2 sc, 7 dc in next sc, sk 1–2 sc, sl st in next sc*, rep around. Adjust stitch counts so scallops sit centered over petal tips and outer leaves (scallop repeat)
Round 3 :
On scallops' top: working into each 7-dc shell, sl st in first 3 dc, ch2, 4 dc in same shell to create upper shell if desired for extra depth. Fasten off neatly and weave ends inside background seams. (double scallop)
Info :
To center scallops between motifs, count shell placement against motif points. Blocking the final runner pinned under slight tension will help maintain scallop shape; spray lightly with steam and let dry under pins.
— Optional Border Highlight (Thin Gold Edging) :
Round 1 :
Using a thin strand of warm gold held single with red (or a slightly thinner yarn), work 1 sc in each top loop along the outer edge of each red scallop to add subtle metallic highlight (highlighted edge)
Info :
This is optional but adds a warm metallic shimmer matching the gold leaves and bead centers in the original. Use care when stitching to keep stitches small and neat.
— Final Finishing Touches :
Round 1 :
Weave in all ends on the reverse side of runner. Recheck all bead attachments and reinforce any that feel loose. Trim any long tails flush with fabric after tucking ends securely. (finished)
Round 2 :
Block entire runner on a flat surface: pin each poinsettia petal, leaf, and scallop so they sit flat and open. Steam lightly and allow to cool dry overnight. Remove pins. (blocked)
Info :
For machine-washable finish, avoid glue on beads and secure beads with multiple pass stitches. Hand wash gently in cool water and lay flat to dry. Keep runner away from high-heat ironing that could melt bead adhesives.
— Yardage Summary and Motif Counts (Example for runner shown) :
Info :
For a runner approx 100–120 cm long you will need: 4 large poinsettia flowers, 24 large green leaves, 40 small cream leaves, 20 gold accent leaves, 12 berry clusters (3 berries each), plus scallop border worked in red. Adjust numbers if you make a longer runner.
Info :
Make motifs in batches: first make all petals, then all centers, then leaves. This assembly-line approach keeps your rhythm and makes it easy to get consistent shapes and sizes.
This festive poinsettia runner brings gorgeous texture, layered petals, and tasteful sparkle to any holiday table. Working modular motifs is a calming, satisfying process — each petal and leaf becomes a small celebration of craftsmanship. When assembled and blocked, the runner looks like a professional heirloom piece ready to be treasured and passed on. 🧶🎄✨