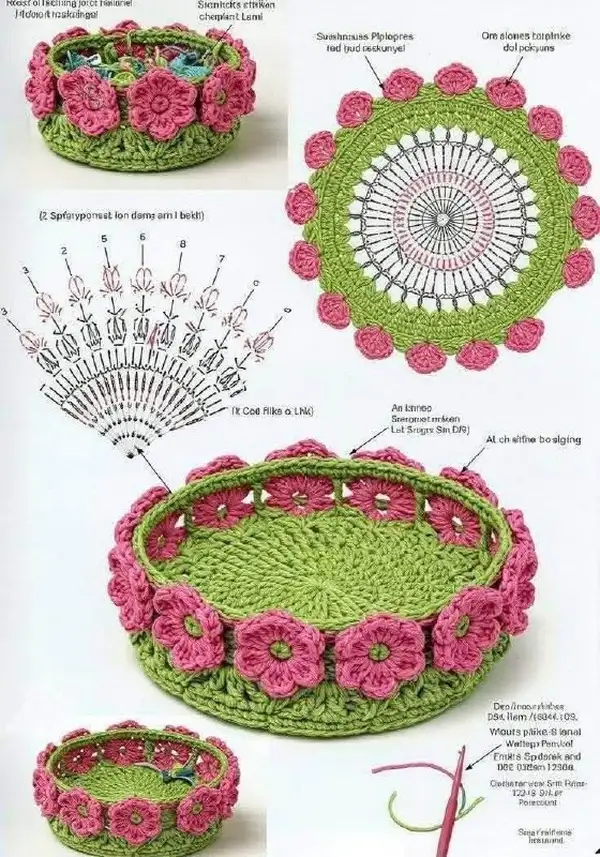
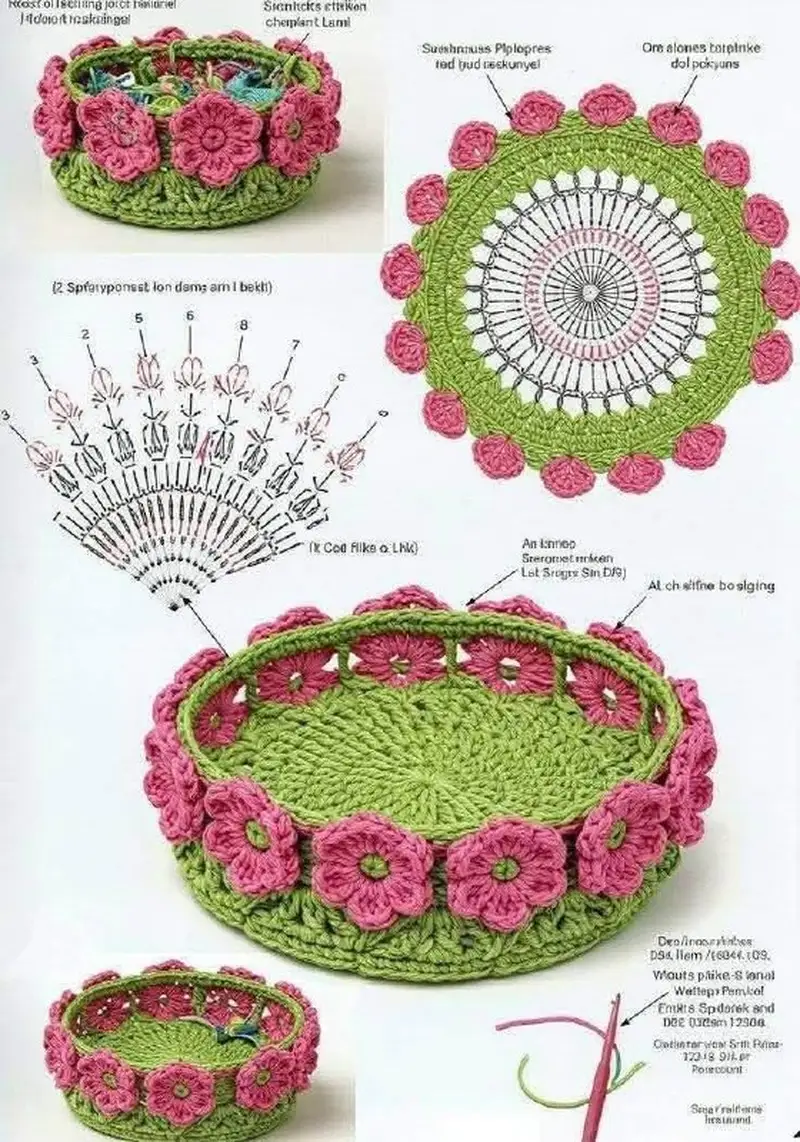
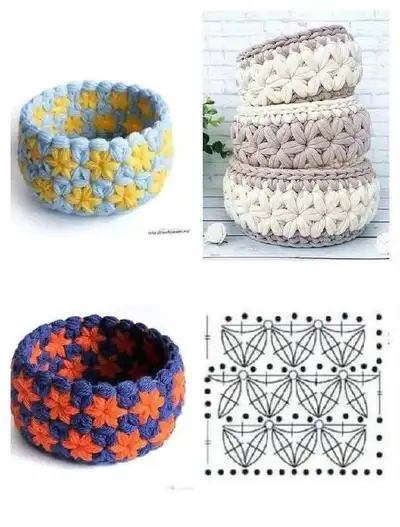
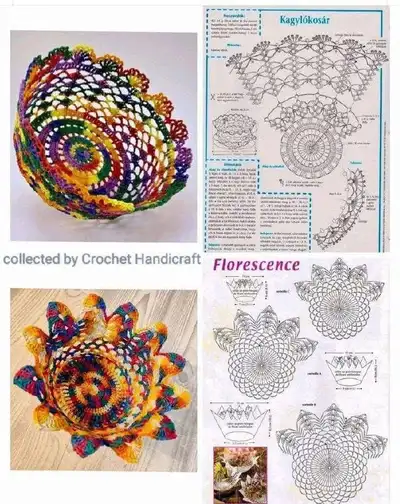
A charming handmade crochet basket with a sturdy green base and a cheerful pink flower rim. This pattern recreates a shallow bowl-style basket perfect for holding small items, lined with a decorative row of crochet flowers and a scalloped edge. The design includes two motif options: a floral-edged basket and a star-puff textured basket variant — both shown in the photos. Clear, step-by-step rounds and assembly tips make this a relaxing weekend crochet project.
Progress Tracker
0% Complete
— Notes and Gauge :
Info :
This pattern describes two complementary basket styles: the Floral-Edge Basket (green base with pink flower trim) and the Star-Puff Textured Basket (chunky, star/puff stitch texture). Gauge is flexible for a decorative basket; aim for a firm fabric with hook slightly smaller than recommended for your yarn. The pictured floral basket finished about 6-7 inches (15-18 cm) diameter using worsted weight yarn. Use smaller or larger hooks to adjust final size.
— Floral-Edge Basket - Base :
Round 1 :
6 sc in magic ring (6)
Round 3 :
(1 sc, inc) x 6 (18)
Round 4 :
(2 sc, inc) x 6 (24)
Round 5 :
(3 sc, inc) x 6 (30)
Info :
Ensure increases are staggered evenly. Use a stitch marker in the first stitch of each round and move it up each round. If the circle begins to ruffle or cup, stop increasing for 1-2 rounds to level.
Round 6 :
(4 sc, inc) x 6 (36)
Round 7 :
(5 sc, inc) x 6 (42)
Round 8 :
(6 sc, inc) x 6 (48)
Round 9 :
(7 sc, inc) x 6 (54)
Info :
At this stage your base is expanding. If you want a slightly smaller basket, pause increasing one round earlier. For a wider flat base, continue increasing beyond round 9 using the same logic (add one more sc between increases each round).
Round 10 :
(8 sc, inc) x 6 (60)
Round 11 :
(9 sc, inc) x 6 (66)
Round 12 :
(10 sc, inc) x 6 (72)
Info :
Check base diameter now. With worsted weight and 3.5mm hook this yields approximately 15-18 cm. If you prefer a smaller base, stop at round 10 or 11. If you want a deeper basket, add more increase rounds.
— Floral-Edge Basket - Side Formation :
Round 13 :
1 sc in each st around (72)
Round 14 :
1 sc in each st around (72)
Round 15 :
1 sc in first 6 sts, (1 sc, inc) x 11, 1 sc in last (remaining) sts to total 78 (78)
Info :
Round 15 begins a gentle outward flare to help the sides rise without sharp angles. The increase distribution is important: place increases evenly; the notation above shows typical placement — if needed distribute 6 increases evenly across the round (every 12 stitches) which results in +6 total to 78 stitches.
Round 16 :
1 sc in each st around (78)
Round 17 :
1 sc in each st around (78)
Round 18 :
(4 sc, inc) x 13 (91)
Info :
The increase in round 18 yields a gentle bell shape. If you'd prefer straight sides, work even rounds of sc without increases until desired height. For pictured shallow bowl, this gentle shaping helps thumb-friendly rim placement for flowers.
Round 19 :
1 sc in each st around (91)
Round 20 :
1 sc in each st around (91)
Round 21 :
1 sc in first 3 sts, (sc2tog) repeat 13 times, 1 sc in last 3 sts to narrow slightly (78)
Info :
Round 21 beginnings of inward shaping to provide a tidy rim for attaching flowers. If your basket is wobbling, add one more even round before decreasing to stabilize the side height.
Round 22 :
1 sc in each st around (78)
Round 23 :
1 sc in each st around BLO (78)
Info :
Working in BLO for a round creates a defined rim ridge. This ridge provides a surface to sew or join flower motifs neatly. Place marker at beginning of this round.
Round 24 :
1 sc in each st around (78)
Round 25 :
1 sc in each st around (78)
Round 26 :
sl st into next st, ch 1, turn, 1 sc in each st around (78). Fasten off and weave end if you prefer to finish rim before attaching flowers
Info :
If you plan to join flower motifs with slip-stitch join, do not fasten off. Instead leave a long tail for sewing and proceed to flower motif placement. If you wish to make the scalloped edge first, continue with the scallop instructions below.
— Flower Motifs (Make 12, same motif for each) :
Info :
Each flower is made flat and then sewn around the rim. The pictured basket shows 12 evenly spaced flowers. Count 78 rim sts; spacing 6-7 stitches between centers yields 12 motifs comfortably. Adjust count to your rim circumference: divide total stitches by desired number of flowers to find spacing.
Round 1 :
With pink, mr, ch 1, 8 sc into ring, sl st to first sc to join (8)
Round 2 :
Ch 1, (1 sc, ch 2) x 8, sl st into first sc - creates 8 little loops (16 loops/spaces counting ch-2)
Round 3 :
In each ch-2 space: (sc, hdc, 3 dc, hdc, sc) to form a petal. Repeat 8 petals (40-48 sts around depending on counts). After last petal sl st into base and fasten off leaving long tail for sewing.
Info :
The petal cluster above is a classic lazy-daisy variation: the number of dc in a petal (3) gives a medium-sized petal. For more sculpted petals you can do 5 dc. Make 12 flowers total. Weave in center ends or leave a small loop for a sewn center.
Round 4 :
Optional: With a contrasting small amount of yarn (e.g., yellow), embroider a French knot or sl st in the center for a finished look. Secure and weave ends through the back.
Info :
Make all flowers before joining so you can space them evenly. Pin each flower to the rim, counting stitches between centers — aim for consistent spacing (typically 6 stitches between centers on pictured basket with 78 rim sts).
— Scalloped Rim & Joining Flowers :
Round 1 :
With green or pink (contrast), join at any BLO ridge stitch, ch 1, *skip 1 st, 5 dc in next st, skip 1 st, sl st in next st*; rep around to create scallops. Adjust repeats to match rim circumference (approx 13 scallops with 78 sts)
Info :
The scallop round is optional; it visually connects the flowers and creates a crown. If you used pink flowers, working the scallop in green ties the design together. If you prefer a tidy look, work a smaller 3-dc shell instead of 5-dc shells.
Round 2 :
After completing scallops, fasten off leaving a long tail for weaving; weave tail to underside for neat finish (no visible ends on scallops).
Round 3 :
Position flower motifs evenly around the rim. Using long pink tails, sew centers to the rim through the base of each flower and the BLO ridge and the adjacent sc rounds. Use whip stitch or ladder stitch to join securely, making sure petals flair outward. Sew each flower at 4-6 points around the center to secure.
Info :
When sewing flowers, work from the inside of the basket outward so petals point away from the base. Keep stitches small and consistent to avoid pulling the rim inward. Pin each flower and count stitches between centers to maintain regular spacing.
— Decorative Centre Embellishments (Optional) :
Round 1 :
With small amount of green, make a tiny ring of 6 sc in mr, sl st to join (6) and sew into the center of each flower or leave as tiny accent buds.
Info :
These little centers hide join knots and create a neat finished look. You can also use small beads or buttons, attached securely with thread, for a different aesthetic (not recommended for children's toys).
— Finishing Floral Basket :
Info :
Weave all loose ends to the inside of the basket. If you would like extra stability, cut a circular piece of thin cardboard or heavy felt slightly smaller than the base and glue it into place. This gives the basket a flat, rigid bottom for display or storage. Block the basket lightly if using cotton or ribbon yarn to flatten the base edge.
Round 1 :
Check all joins and adjust petal positions by bending or steaming very lightly (for acrylic yarn only, be cautious). Your floral-edged basket is complete. Enjoy!
— Star-Puff Textured Basket Variant - Materials & Notes :
Info :
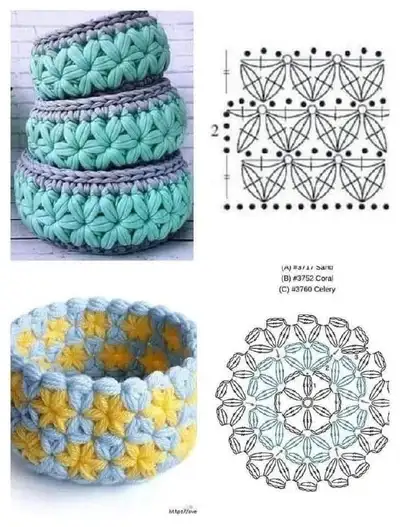
The star-puff variant uses a bulky t-shirt yarn, chunky yarn, or several strands held together to create puff stitches that look like little stars. The sample photos show small nested baskets worked in stacked height. The pattern below assumes a 4.5mm-6.5mm hook depending on your yarn. This section includes a full round-by-round build for a small basket approx 6-10" depending on yarn.
— Star-Puff Variant - Base (Foundation) :
Round 1 :
6 sc in mr with bulky yarn (6)
Round 3 :
(1 sc, inc) x 6 (18)
Round 4 :
(2 sc, inc) x 6 (24)
Round 5 :
(3 sc, inc) x 6 (30)
Round 6 :
(4 sc, inc) x 6 (36)
Info :
Bulky yarn will build up quickly. Check your base diameter: stop at round 5 or 6 for smaller baskets. The bulky puff texture will make sides more vertical with fewer rounds.
Round 7 :
1 sc in each st around (36)
Round 8 :
Switch to star/puff stitch round as follows: *ch 2, yarn over, insert hook into same base stitch, yo and pull up loop (repeat 4 times to have 5 loops on hook), yo and pull through all loops, ch 1 to close puff, sl st into next st*; rep around to create star motifs in every other st or in defined pattern (stars spaced every 3 sts depending on diagram)
Info :
Star/puff stitch variations differ: some diagrams show clusters of 4 or 5 half-double crochet pulls to create the star. Follow the diagram spacing: work puff clusters in groups, then join with sl st or single crochet between clusters. Use consistent tension to make puffs uniform.
Round 9 :
After completing first puff round, ch 1, sc into each st or into spaces between puffs to anchor (36). Continue alternating puff rounds with anchoring sc rounds to build height and texture.
Round 10-22 :
Repeat puff round + 1 anchoring sc round sequence until basket reaches desired height. Sample: 6 puff rounds separated by 6 anchoring rounds (12 rounds total) yields a shallow basket approx 3-4 inches tall. Adjust number of repeats to desired depth.
Info :
For a nested set as pictured, make three sizes: small, medium, large by changing number of increase rounds at base (4-6 rounds for small, 6-8 for medium, 8-10 for large) and adjusting puff sequences for height.
Round 23 :
Work 1 sc in each st BLO to create a neat rim ridge (36). Fasten off and weave ends inside the basket.
Info :
If you want a pronounced rim like the photo, after round 23 work one additional round of slip stitches in contrasting color around the top to make a tidy top edge.
— Star-Puff Variant - Alternate Color Mosaic Option :
Round 1 :
Work base as above to desired diameter. For mosaic-style stars in alternating colors, change color at the start of a puff round. Carry unused yarn on the inside or cut and weave ends if using bulky yarns where carrying is awkward.
Round 2 :
Work puff clusters in color A in the pattern chart: *puff in st 1, skip 1, puff in st 4*; in next row offset puff placement to nest stars in between; this creates the honeycomb-like pattern seen in the smaller photo.
Info :
Alternate two colors every puff row for a checkerboard of puff stars. Keep tension consistent and count carefully where puffs fall relative to base stitches. Use a stitch marker at the start of each puff row.
— Additional Decorative Options & Edge Treatments :
Round 1 :
For both basket styles you can add a braided cord or crocheted i-cord sewn around the rim to create handles or a rope-like accent. To create a simple rope, chain desired length, slip stitch back along chain, and sew in place on top of rim.
Info :
Handles: stitch two small loops opposite each other on the rim using sc or ch loops, reinforce by sewing to inside of basket for strength. Consider lining baskets with fabric if holding small or sharp objects.
— Stitch Mathematical Notes and Variations :
Info :
Circle increase math: each complete increase round that adds one extra sc between increases will add 6 stitches for a circular base started with 6 sts. Adjust increase pattern if starting with a different initial stitch count. When converting to different gauge yarns, keep increase pattern but be aware the resulting diameter will change proportionally.
Info :
If your stitch counts do not match mine, recount and check that you did not inadvertently increase or decrease more or less than specified. Because many rounds are even rounds where stitch count should be constant, use that as a sanity check.
— Care & Maintenance :
Info :
Baskets made of acrylic or cotton yarn can typically be hand-washed gently and reshaped while damp. Bulky t-shirt cord may need spot cleaning. If you added a cardboard base, avoid soaking; spot clean to protect the insert.
Info :
To shrink or stiffen a cotton basket slightly, wet block and air dry over a bowl of the desired shape. For extra stiffness, spray lightly with a fabric stiffener and dry as per product instructions.
Finishing this basket is such a satisfying moment — watching the flat base rise into a neat, functional bowl and then crowning it with petals or textured stars is delightful! The contrast of sturdy base and delicate flower rim makes it an eye-catching accent for any shelf or dresser. Whether you choose the floral rim or the chunky star-puff texture, each stitch brings a little more personality to your home. 🧶🌸 Take a photo and share your creation with pride — handmade charm never goes out of style! 😊