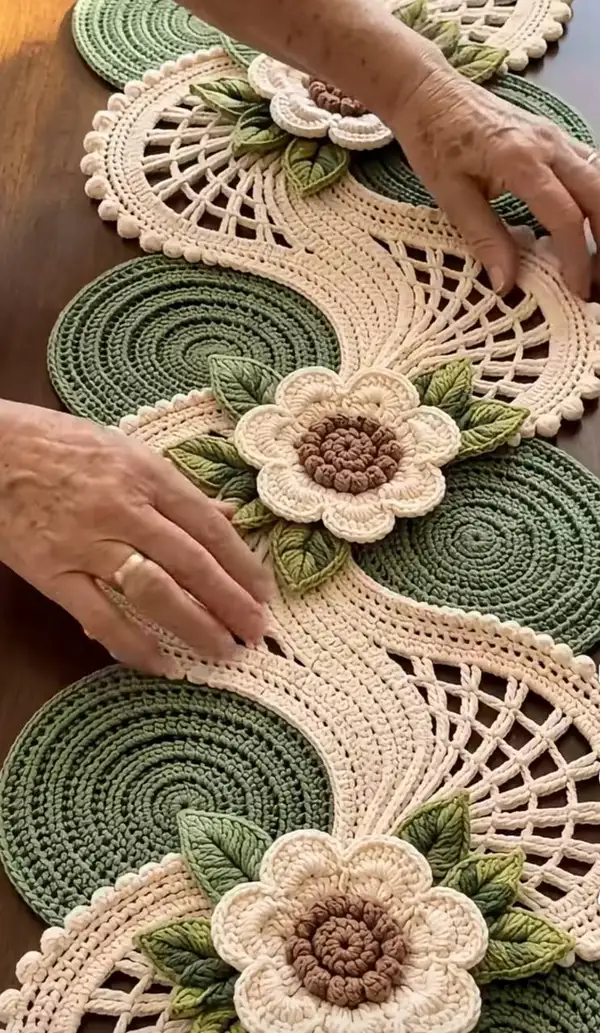
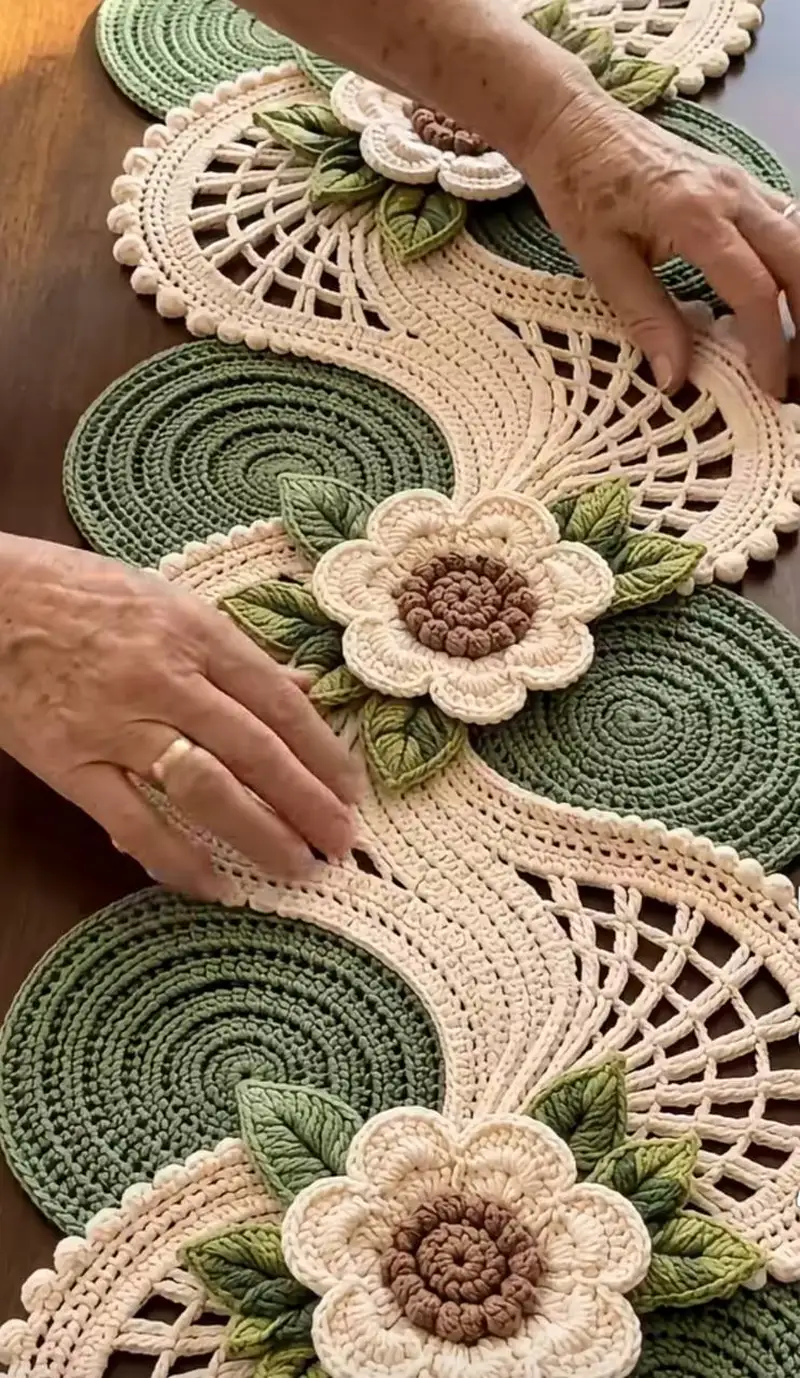
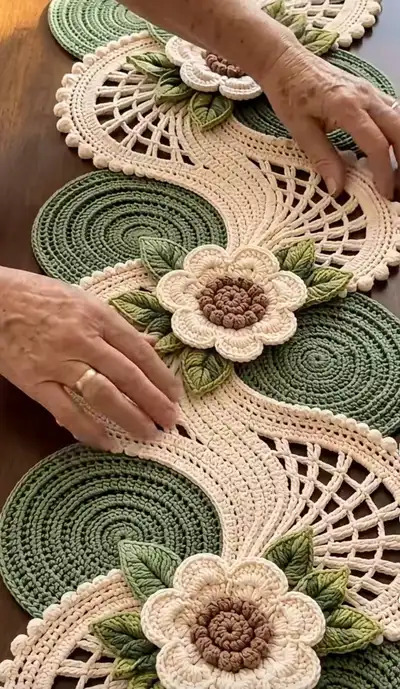
Create an elegant, hand-crocheted table runner featuring concentric green circle motifs, flowing cream S-shaped connector panels, delicate latticework and layered floral appliques with sculpted leaves. This pattern walks you through each motif, mesh connector, petal and leaf so you can assemble a show-stopping centerpiece for your dining table. The finished runner has tactile texture, bobble edging and repeatable motifs for a customizable length.
Progress Tracker
0% Complete
— Concentric Circle Motif (Make 6 or as many repeats as desired) :
Round 1 :
6 sc in magic ring (6)
Round 3 :
(1 sc, inc) x 6 (18)
Round 4 :
(2 sc, inc) x 6 (24)
Round 5 :
(3 sc, inc) x 6 (30)
Info :
Use olive green for rounds 1-5. Work tight stitches in the magic ring to avoid a visible hole. Place a stitch marker at the first stitch of each round
Round 6 :
(4 sc, inc) x 6 (36)
Round 7 :
(5 sc, inc) x 6 (42)
Round 8 :
(6 sc, inc) x 6 (48)
Round 9-12 :
1 sc in each st (48)
Info :
Check your circle lays flat. If cupping occurs, add a round of increases evenly spaced (e.g., (7 sc, inc) x 6). If ruffling occurs, remove a round of increases in next repeat.
Round 13-18 :
1 sc in each st (48)
Round 19 :
(6 sc, 1 inc) x 6 (54)
Round 20 :
1 sc in each st (54)
Round 21 :
(7 sc, 1 inc) x 6 (60)
Round 22-28 :
1 sc in each st (60)
Info :
These concentric circles use tight single crochet rounds for a dense, placemat-like texture. Block each circle flat after finishing and before joining to the S-bridge to ensure smooth joins.
— Cream S-Shaped Connector Panel (Make length pieces to join circles) :
Round 1 :
6 sc in magic ring (6)
Round 3 :
(1 sc, inc) x 6 (18)
Round 4 :
(2 sc, inc) x 6 (24)
Round 5 :
(3 sc, inc) x 6 (30)
Info :
Switch to soft cream color at Round 5. This panel is worked as a long, spiraled oval and is sculpted by selective increases and decreases along opposing sides to create an S curve. Keep stitch marker at start of each round
Round 6 :
(4 sc, inc) x 6 (36)
Round 7 :
(5 sc, inc) x 6 (42)
Round 8 :
(6 sc, inc) x 6 (48)
Round 9-12 :
1 sc in each st (48)
Info :
To shape the S, we will work partial decreases on one side and increases on the other every 6 rounds. To track sides, place removable pins at four quadrant points of the panel while working.
Round 13 :
(6 sc, 1 dec) x 6 (42)
Round 14-16 :
1 sc in each st (42)
Round 17 :
(5 sc, 1 inc) x 6 (48)
Round 18-20 :
1 sc in each st (48)
Info :
When rounds use increases only on one side, work the increases spaced evenly across the entire round. The shaping effect is produced because you'll alternate which side receives a greater gauge by blocking and by oversupplying or undersupplying increases every third set of rounds.
Round 21 :
(4 sc, 1 dec, 6 sc, 1 inc) x 4 across (48) - see note
Info :
Round 21 uses a mixed shaping approach: work the dec cluster across the side you want to curve inward (rear side), and the inc cluster across the outward side. Example repeat above must be distribued along the round so totals remain balanced.
Round 22-26 :
1 sc in each st (48)
Round 27 :
(6 sc, 1 dec) x 6 (42)
Round 28-30 :
1 sc in each st (42)
Round 31 :
(5 sc, 1 inc) x 6 (48)
Round 32-36 :
1 sc in each st (48)
Info :
The panel should have an undulating S-like outline that will nest between circular motifs. If the panel becomes too wide, remove one increase round; if too narrow, add an increase round early (repeat round 31 pattern) until it nests comfortably.
Round 37 :
(4 sc, 1 dec) x 6 (42)
Round 38 :
(3 sc, 1 dec) x 6 (36)
Round 39 :
(2 sc, 1 dec) x 6 (30)
Round 40 :
(1 sc, 1 dec) x 6 (18)
Info :
Fasten off leaving a long tail for seaming to circles if you plan to sew the end. Generally, you will stop the panel at Round 36-37 and join to a circle before tapering to Round 40 which is optional for decorative ends.
— Lattice Mesh Insert (Make 2 per S-bridge opening) :
Round 1 :
Ch 20, join to form ring with sl st, ch 3 (counts as dc) (20 ch ring)
Round 2 :
Work 1 dc in each ch around (20 dc)
Round 3 :
Ch 3, *skip 1 st, dc in next st* repeat around creating slight openwork (approx 20 dc)
Round 4 :
Ch 4, *dc in next dc, ch 1* repeat creating mesh foundation (20 dc, 20 ch-1 sps)
Round 5 :
Ch 4 (counts as tr), *tr in next dc, ch 2, skip 1* repeat to produce taller mesh (20 tr)
Info :
Work the mesh inserts flat and block them before joining. The lattice is attached into the open arch created in the S-bridge; measure the arch opening and adjust ch count at Round 1 to match the opening size.
Round 6 :
Ch 3, 1 dc in each tr and ch-1 space around, smoothing the edge (around 40 dc total depending on spacing)
Round 7-10 :
1 sc in each st around to create a neat edge (same stitch count each round)
Info :
When sewing mesh into the S-bridge, align top and bottom points so the diamond pattern runs symmetrically. Use mattress stitch with matching cream yarn for invisible joins.
— Flower Applique (Make 3) :
Round 1 :
Using light brown, mr, 6 sc in ring (6)
Round 3 :
(1 sc, inc) x 6 (18)
Round 4 :
1 sc in each st (18)
Info :
Fasten off brown and join cream for the petal base. Center is a textured spiral; use tight tension so center sits raised from petals.
Round 5 :
Join cream, ch 1, *sc in next st, ch 3, sl st into same st* repeat around to create 9 ch-3 loops (18 sc/loops total)
Round 6 :
In each ch-3 loop: (sc, hdc, 3 dc, hdc, sc) to form a petal (creates 9 petals)
Round 7 :
Work an edging round of sc in each st around petals to shape and even them (approx 9 petals x 7 sts = 63 sc)
Info :
For a fuller flower, after Round 6 make a second petal round offset between existing petals by working into the spaces between petals: ch 2, sc, ch 2, sl st between petals creating layering.
Round 8 :
Fasten off leaving a long tail for sewing. Weave center tail toward back and use to sew flower to the S-bridge and top of circle junctions.
— Leaf (Make multiple per flower; pattern makes one leaf) :
Round 1 :
ch 8, sc in 2nd ch from hook, hdc, 2 dc, 3 tr, 2 dc, hdc, sc, sl st to form a teardrop leaf (approx 8 sts)
Round 2 :
Turn to work along the outer edge: sl st down the first side to the base, ch 1, sc across base, then sl st up the other side mirroring stitches used to make neat edge
Round 3 :
Using leaf green, embroider central vein: with yarn needle and contrasting green, stitch a raised ridge using surface slip stitch from base to tip
Info :
For sculpted, dimensional leaves use FLO on Round 2 (1 sc in each st FLO) to create a central ridge where the vein will sit. Make leaves in two shades for layered depth.
Round 4 :
Fasten off leaving long tail for sewing. Make 2-4 leaves per flower; vary orientation (some pointing toward circle center, some outward).
— Scalloped Bobble Edging (Work around assembled runner last) :
Round 1 :
Join cream at any outer edge, ch 1, sc evenly around edge to smooth raw edges (working sc into rounds of circle and panel join points)
Round 2 :
*skip 2 sts, 5 dc in next st (bobble cluster), skip 2 sts, sc in next st; rep around*
Round 3 :
Work one more round of sc to secure bobbles: 1 sc in each st (keeps scallop neat)
Info :
Keep bobble clusters evenly spaced. If edging pulls, adjust spacing: use skip 1 sc between bobbles for tighter scallops or skip 3 for looser big scallops.
— Finishing & Joining Notes :
Info :
Block all pieces flat. Lay out circles, S-bridge panels and mesh to create the flowing S arrangement. Pin in place and baste using long tail yarn to keep alignment while sewing final seams.
Info :
Use mattress stitch or whip stitch with matching cream yarn to sew the S-panel edges to the sides of circle motifs. Sew from the back when possible and take small stitches catching front loops for an invisible join.
Info :
Attach flowers at circle junctions by sewing through the back of the flower center and into the rounds of both the circle and the S-bridge for a secure hold. Sew leaves under petals and tack into the panel to avoid flipping.
Info :
Weave in all ends into adjoining rounds and trim close. Lightly steam block the entire runner to settle stitches and give a polished look; do not press directly on bobbles.
Completing this runner is a joyful, tactile experience — combine circular structure with flowing lace and floral appliques for a centerpiece that feels both classic and fresh. Each stitch adds texture and personality, and the modular design means you can customize length and color easily. Enjoy the slow rhythm of stitching, blocking, and assembling — the result is a gorgeous handmade accent your table will wear proudly. 🧶🌿✨