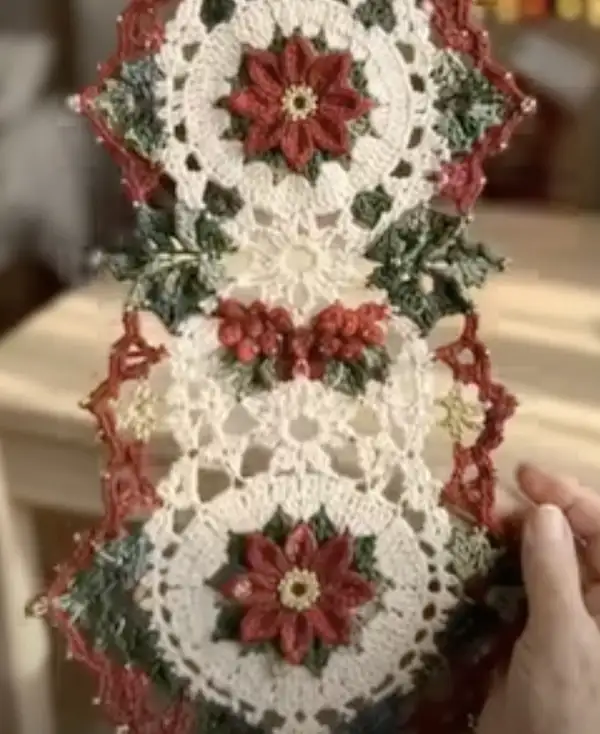
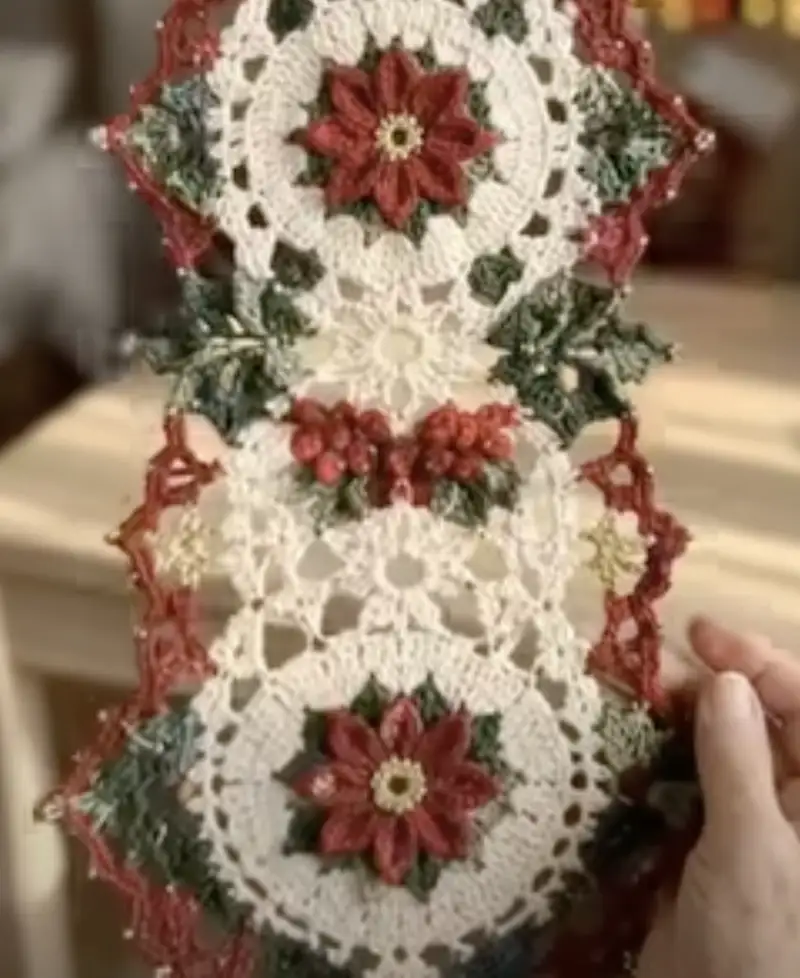
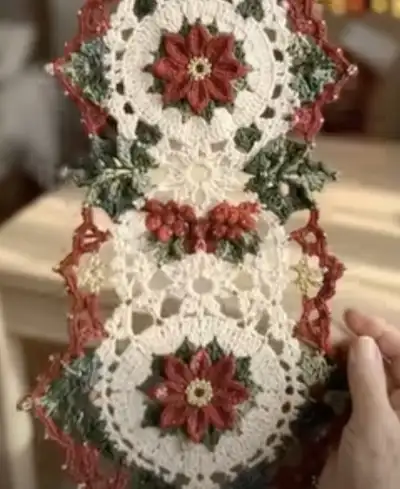
A delicate table runner made from linked circular medallions featuring raised mini-rose/poinsettia centers, leafy clusters and a lacy scalloped border. Warm cream ground with rich red flowers, deep green leaves and golden centers give this runner a vintage holiday charm. Join-as-you-go construction and layered petal techniques create lovely dimensional texture. This pattern explains each motif, leaf cluster, berry grouping and final edging in detail for confident crocheters.
Progress Tracker
0% Complete
— Materials & Gauge :
Info :
Gauge is not critical for this runner but for proportion use 16 dc = 4" on a 3.5mm hook in worsted weight. Adjust hook for a fabric that blocks flat without big gaps. Pattern assumes US stitch terms.
— Poinsettia Large Medallion (Make 3 for runner) :
Round 1 :
12 dc in magic ring, join with sl st to first dc (12)
Round 2 :
Inc in each st around (24)
Round 3 :
(1 dc, inc) x 12 (36)
Round 4 :
(2 dc, inc) x 12 (48)
Round 5 :
(3 dc, inc) x 12 (60)
Info :
At this stage you have 12 radial segments of 5 stitches each (60 sts). These segments form the framework for petal placement so keep an even tension.
Round 6 :
1 dc in each st around (60)
Round 7 :
1 dc in each st around (60)
Round 8 :
1 dc in each st around (60)
Info :
Rounds 6-8 create a stable ring to attach raised petals without changing the base stitch count. Work a touch looser on these rounds compared to the inner rounds so petals do not pucker.
Round 9 - Petal Base :
*Ch1, sc in next 5 sts, ch3, skip next 5 sts* repeat around to create 12 sc-blocks separated by ch spaces; finish with sl st to first sc (60 base sts remain but you will have 12 ch-3 spaces)
Info :
Each ch-3 space will be the anchor for an overlay petal worked in the next rounds. The 'sc in next 5 sts' uses the 5-st segments to keep base count consistent so your overall stitch count remains 60.
Round 10 - Petals (overlay - red yarn) :
Attach red yarn to first ch-3 sp: (ch2, 4-tr cluster into same ch-3 sp, ch2, sl st in same sp) *sl st into next ch-3 sp, (ch2, 4-tr cluster, ch2, sl st)* repeat around to create 12 raised petals. Fasten off. (Base 60; overlay creates 12 petals)
Info :
4-tr cluster: yarn over, insert, yarn over pull up, repeat 4 times leaving last loop from each on hook, yarn over and pull through all loops, ch1 to close as needed. Use a 3.0mm hook for petals if you prefer slightly tighter texture.
Round 11 :
Rejoin cream yarn to top of any sc between petals. Work: *sc in next sc, ch3, sc in next sc, ch3* repeat around to create alternating open spaces (60)
Round 12 :
Work 1 dc in each st and 2 dc in each ch-3 space around to expand lace (72)
Info :
Round 12 increases stitch count to 72 because each of the 12 ch-3 spaces accepted 2 dc; math: base 60 + 12 increases = 72.
Round 13 :
(3 dc, ch2, skip next 1 st) repeat around across 12 segments to make decorative arches (72)
Round 14 :
1 dc in each st (72)
Round 15 :
(2 dc, dec) x 24 (48)
Info :
Round 15 begins shaping outwards to create a subtle scallop around the medallion; relief from petals should remain visible above this round.
Round 16 :
1 dc in each st (48)
Round 17 :
(1 dc, inc) x 24 (72)
Info :
Round 17 purposely increases to open lace again; this helps when adding leaf joins and the outer lacy border in later rounds.
Round 18 :
*ch3, skip 2 dc, sc in next dc* repeat around creating 24 ch-3 spaces (72)
Round 19 - Leaf Points Attachment (green yarn) :
Attach green yarn to each ch-3 sp and make in each: (sl st, ch2, puff (5 loops) in same sp, ch2, sl st). This forms a small leaf point at each of the 24 spaces. Fasten off. (Base 72)
Info :
Puff (5 loops): yarn over, insert, pull up loop; repeat 5 times leaving loops on hook; yarn over and pull through all loops, ch1 to close. Slightly tug to make a pointed petal; stitch back into base for stability if necessary.
Round 20 :
Rejoin cream yarn and work sc around each puff base: *sc in next 2 sts, sc around puff base firmly* repeat to maintain 72 base points
Round 21 :
Work 1 dc in each st (72)
Round 22 :
*(3 dc, ch2, 3 dc) in every 6th st to create 12 shell points* fill remaining sts with 1 dc each to finish round (72)
Info :
Round 22 sets anchors for the outer joining picot round; shells should sit evenly between leaf puffs and raised petals to be visually balanced.
Round 23 :
*ch3, sl st in top of next shell center, sc in next 3 dc* repeat creating decorative chain loops around (72)
Round 24 - Outer Edging (variegated/red yarn) :
Change to edging color. In each ch-3 loop work: (sc, ch3, sc, picot, sc) where picot = ch3, sl st in 3rd ch to form small points. Repeat around and join. Fasten off. (72)
Info :
Edging color adds the delicate scalloped highlight. Picots are optional but create the small bead-like tips seen in the photo. Use a 3.0mm hook for a neat picot edge.
— Small Connecting Rosette (Make 4) :
Round 1 :
10 dc in magic ring; join (10)
Round 2 :
Inc in each st around (20)
Round 3 :
(1 dc, inc) x10 (30)
Round 4 :
1 dc in each st (30)
Round 5 - Small Petals :
*Ch2, (hdc, dc, hdc) all in next st, ch2, skip 2 sts, sl st in next st* repeat to form 10 small petals (30 base)
Info :
These rosettes are used as connectors between large medallions. Make them slightly smaller so the runner narrows between the big circles as in the sample.
Round 6 :
Rejoin cream and work 1 sc around each petal base, filling gaps with ch-2 loops to maintain flatness (30)
Round 7 :
*(2 dc, ch1, 2 dc) in every 5th st, dc in remaining sts* repeat to create 6 small shell spaces for beading or berry cluster joins (30)
Round 8 :
Optional: Add small golden center by chaining 4, sl st into center and embroider little French knots or use beads. Fasten off.
— Leaf Cluster (Make many, 12 clusters around runner) :
Round 1 :
With green yarn ch6, sl st to form ring, ch1 (ring counts as 0)
Round 2 :
Into ring work: sc, hdc, 4 dc, hdc, sc - fasten off to form a single leaf (7 sts top). Repeat to make clusters of 3 leaves sewn together (for each cluster make 3 leaves)
Info :
Sew three leaves together at bases with matching green yarn to create a realistic leaf cluster. Shape leaves by pinching and blocking lightly.
Round 3 :
For each leaf cluster, add 2 small ch-2 loops and a picot edge around outer leaf tips (no base count change)
Info :
Leaf clusters accent the joins between large medallions and small rosettes - place them symmetrically for an even look.
— Berry Cluster Accent (Make 6) :
Round 1 :
With red yarn, ch3, sl st to first ch to make a tiny ring
Round 2 :
Work 9 small sc into ring but do not join; fasten off leaving long tail to sew (9 tiny berries per bunch)
Info :
Use three small rings of 3 sc each and sew them together to imitate little berry bunches. Stuff each berry lightly with a fuzzy bit of fiber if you want them puffed.
— Join-as-you-go & Runner Assembly :
Info :
Arrange three large medallions with one small rosette between each large medallion to form the runner: large - rosette - large - rosette - large (3 large, 2 small). Place leaf clusters and berry clusters at the joins as in photo.
Round 1 :
Lay first large medallion flat. With cream yarn, prepare to join second medallion by working a join-as-you-go round: working into outer round shell spaces of medallion A, sl st into corresponding shell on medallion B as you work to connect two motifs. Work 1 sc in each shell and sl st to join at 6 equally spaced connection points so the motifs are joined but still have a small ch gap for lace. (No stitch count change to motifs)
Info :
Pin motifs together before joining to ensure symmetrical joins. Use stitch markers at the 6 equidistant shells on each motif to line them up correctly.
Round 2 :
At connection points between medallions and small rosettes, use the small rosettes as bridging motifs. Slip stitch through loops on both adjacent motifs to secure a flat seam, then secure with a few whip stitches with cream yarn behind the work for strength.
Round 3 :
Attach leaf clusters at specified join points by sewing the cluster base to the cream base where shells meet; tack firmly with whip stitch.
Round 4 :
Sew berry clusters on top of leaf clusters using long tail from berry rounds. Arrange berries in groups of three, securing each berry with a few stitches through the base and runner ground to anchor them.
Info :
Check the runner layout often; adjust leaf cluster angles before sewing final secure stitches so clusters look natural and not too flat.
— Final Scalloped Border (work around whole runner) :
Round 1 :
With cream yarn, single crochet evenly around entire runner edge, working 3 sc in each corner curve or shell point to keep edge flat. Maintain a total stitch count equal to runner perimeter divided into even segments - this is variable per your assembly; simply work sc evenly and mark start. (count depends on joined runner circumference)
Round 2 :
Work 1 hdc in each sc for one round to create a defined border band (same stitch count as previous round)
Round 3 :
Change to variegated or red yarn for scallops. *In each shell point do: (sl st to next st, ch3, 5 dc in next st, ch3, sl st in same st) then skip 3 sts and sl st into next* repeat around to create pronounced scallops. Join and fasten off.
Info :
Scallops give the runner the finished lacy frame. Add tiny picot tips with gold yarn if you want the jewel-like points visible in the image.
Round 4 - Optional Beaded Picot Trim :
Using gold thread or yarn, work sl st to tip of each scallop, ch3, thread a small bead, ch1 and sl st back into scallop to secure bead. This is purely decorative and optional for table use. Fasten and weave ends.
— Blocking & Finishing :
Info :
Soak runner in lukewarm water with a tiny amount of mild detergent, press out excess water, pin to blocking mat matching intended shape, and let dry. Light spray starch can be used on scallops for stiffness. Weave in all ends on the back, hiding tails under the cream rounds.
Round 1 - Alternate Small Detail Rounds :
Many small rounds of decorative chains and surface slip stitches can be added between the motifs and around leaves to emulate the fine lacy filigree seen; these are worked as surface joins and do not alter core counts but should be applied symmetrically for balance.
Info :
Throughout the medallion instructions, overlay petals and puff leaves are overlay techniques and they do not change the base count when worked into ch spaces. When in doubt, keep base rounds stable (repeat counts as noted) and create textures atop the base.
Notes on Stitch Math and Consistency :
All rounds that say '(number) st' indicate the working stitches visible in that round. Overlay rounds that add petals/puffs are anchored into spaces and typically do not change the stitch count of the underlying round. When increasing and decreasing, follow the explicit math indicated per round—if a round instructs '(2 dc, inc) x 24' ensure the total reflects the number of repeats times (base pattern).
This mini-roses table runner pattern brings together dimensional petals, leafy clusters and a delicate scalloped border to create a charming centerpiece. Working each medallion is a satisfying, rhythmic process, and joining them builds this elegant runner step by step. Block and finish with tiny picots and beads to catch the light—it's a perfect heirloom-style accent for holidays or everyday charm. 🧶🌿✨